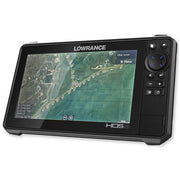
While many of the Lowrance menus, options and functions are similar, there may be slight differences in how you install and configure the map cards on different units.
The instructions below are the most common for most units.
The basic steps to installing and configuring your Lowrance Unit are:
1. Load map card and Charts
2. Select Chart Source
3. Turn on "Shaded relief" (if applicable)
4. Configure category Overlay Data on your GPS Unit
5. Enjoy!
Lowrance GPS Card Installation Instructions:
Important Note: Make sure your Lowrance Unit is running the current version of software. You can check and download the latest software versions by clicking HERE!
1. Turn on the GPS unit before inserting the GPS Map SD Card.
2. Accept the safety warnings.
3. In most cases, The Lowrance Unit will display "Loading Maps" at the bottom of the screen.
4. Once the Lowrance Unit finishes Loading , It will typically prompt a pop up that reads "Do you wish to change Chart Data Selection to view the inserted charts? (TX TRAX) The chart name will be in parenthesis.
If you do not get this pop up, you can still load chart by navigating to Menu-> Options -> Chart source and selecting the Chart Source name ( State Trax).
5. Once the correct Chart Source is selected, the map still may not show up on most units until you enable "Shaded Relief"
6. To enable shaded relief, in the top right corner of the screen, navigate to Menu-> Options -> Chart Options and click "Shaded Relief".
An orange arrow on the corner of the shaded relief button will show you that the GPS Map is active.
7. You should now see the GPS Map Card if you are within the Map Area. If not, move the cursor to the map area or click "Clear/Restore Cursor"
8. Zoom in and out. You should see the clarity and zoom images change as you change to different zoom levels.
Changing Overlay Options (Categories)
All of Overwatch Maps come with data Overlays of Fairway Lines, Buoys, Channel Markers, Obstructions and more. These options can become cluttered on your screen at certain zoom levels. Each of these Options can be turned on or off, depending on what you would like to view on your GPS Unit.
1. Once you GPS Map Card is displaying correctly, you will see Chart Data Overlays.
2. To turn these options on/off click the menu in the top right of your screen and navigate to Menu-> Options -> Chart options -> Categories.
3. You will see a list of Categories with drop down options.
4. To turn off a group and all its contents (Major Category) select the group to toggle on/off.
To turn off just a section of that group, open the group first and select the sections you want to turn on/off (minor Category).
5. You can turn these options on/off at any time.


